The UC6550 is a tube amplifier operating in either triode or ultralinear mode with selectable degrees of feedback. Below is the front and back panels. Each knob and plug will be explained.
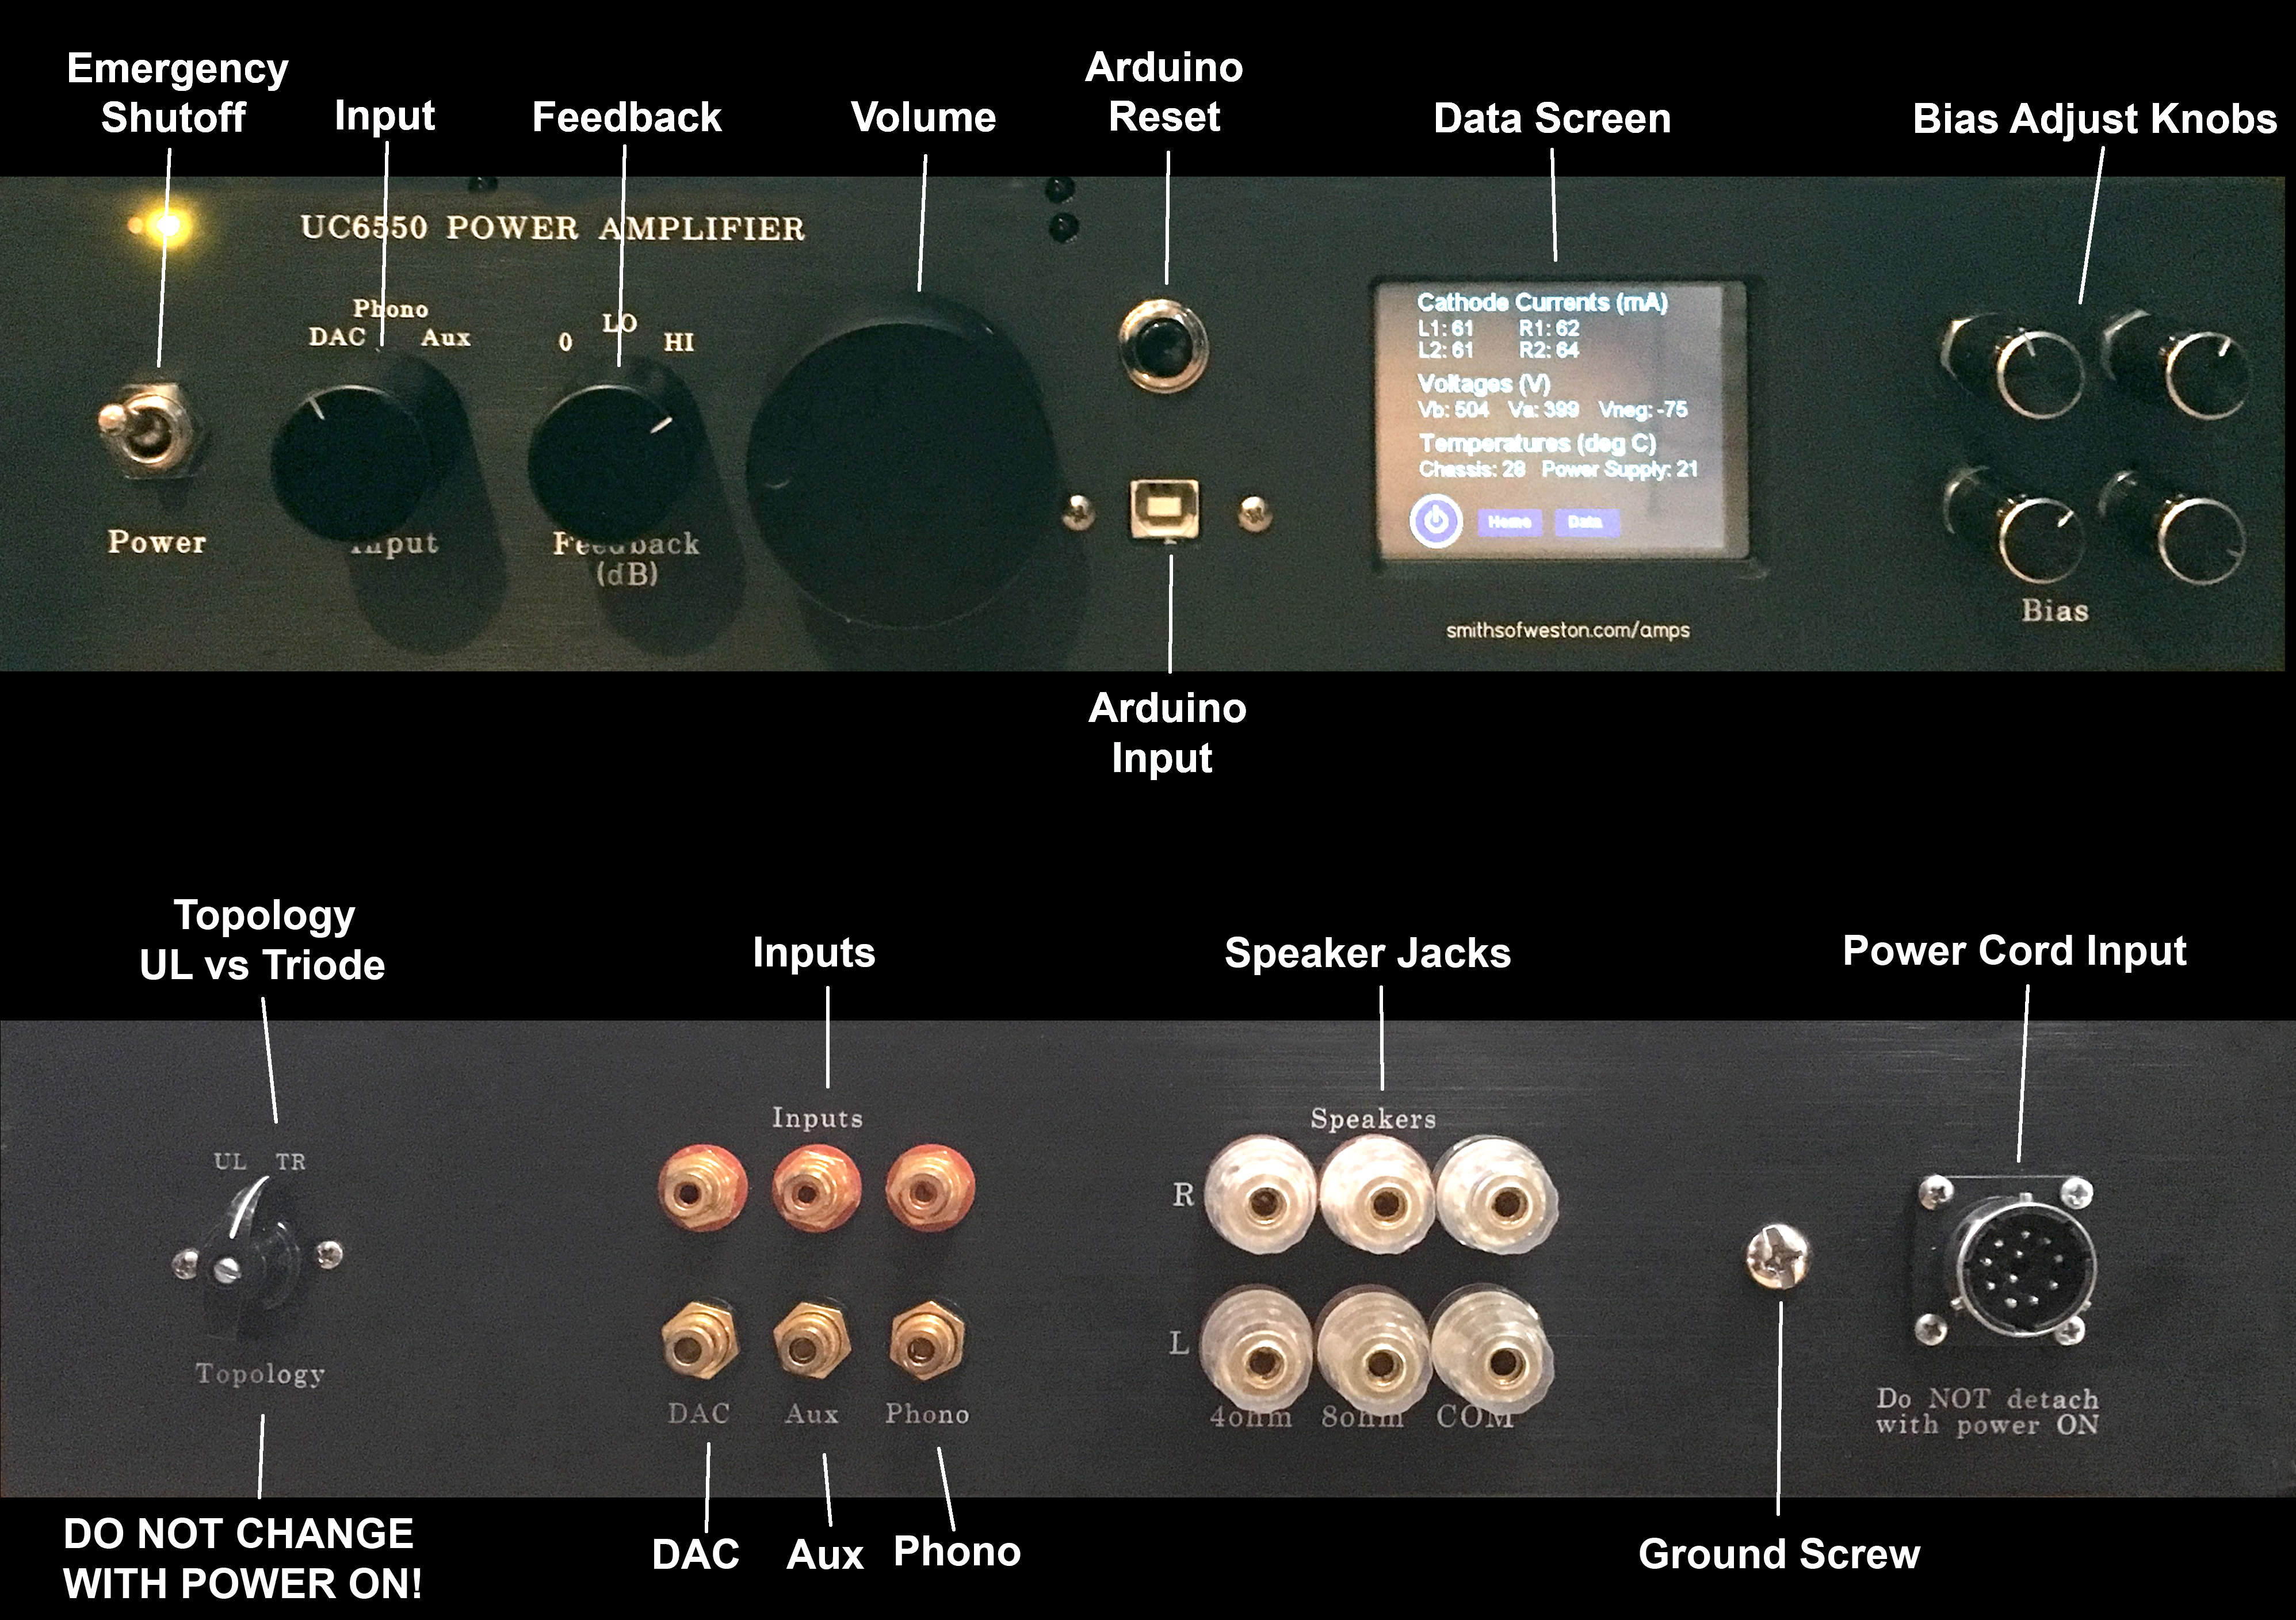
FRONT PANEL
Emergency Shutoff - This is only to be used in emergencies, such as a tube glowing bright red, or sparks, fire, etc. It only kills power to the tubes. Use the power switch on the Power Supply to kill all power.
Input - Self-explanatory
Feedback - higher feedback decreases distortion and output impedance, both desirable effects, but you will have to turn the volume knob higher if you use higher feedback. Try different settings to see which you prefer. If you use the ultralinear setting (see below), you will definitely need higher feedback.
Volume - manual control. The knob actually turns when the remote control is used.
Arduino Reset - Do not use. This is only used during programming of the Arduino at the factory. :)
Arduino Input - This is only used during programming of the Arduino.
Data Screen
- Cathode Currents - these should all be within 3 ma of each other. Use the bias knobs to the right to adjust them to 60ma. Note that because of variations in your house line voltage, these may be as high as 65 ma. That is OK. Anything above 65ma is too high. Be aware that the numbers will jump around when music is playing. Only take the values seriously or make any adjustments when there is no music playing and after at least 10 minutes of warmup.
- Vb - this is set to 500V, but again will range by as much as plus/minus 5%.
- Va - this is regulated at 400V and should be pretty close to that at all times.
- Vneg - should be around -70 to -75V.
- Chassis Temperature - tubes run hot, and the chassis temperature can run up to 45-50 degrees celsius.
- Power Supply Temperature - should be cooler than the chassis.
Bias Adjust Knobs - adjust these until the cathode currents on the main screen are close to equal and around 60ma. Adjust slowly, as the cathode currents respond slowly to adjustments. Also, only make adjustments when there is no sound coming from speakers and after at least 10 minutes of warmup.
REAR PANEL
Topology - IMPORTANT! DO NOT change Topology settings with the power on - arcing could occur across the switch and damage it. Two settings:
- TR (Triode) - A vacuum tube triode is the most linear device in the world and very low distortion can be attained without much feedback. Triode mode should give a somewhat warmer, sweeter sound but maximum power is reduced. It is still PLENTY for normal listening levels. Feedback set at LO or HI should give excellent sound
- UL (Ultralinear) - this mode was invented in the early 50's to reduce distortion in tetrodes such as the 6550, while still preserving power. This mode provides up to 50W power but a slightly edgier sound with a little more distortion. Many people prefer this mode. Probably a little more feedback is needed vs Triode mode.
Inputs - This corresponds with the switch on the front panel. Note that the top row is RIGHT and the bottom row is LEFT
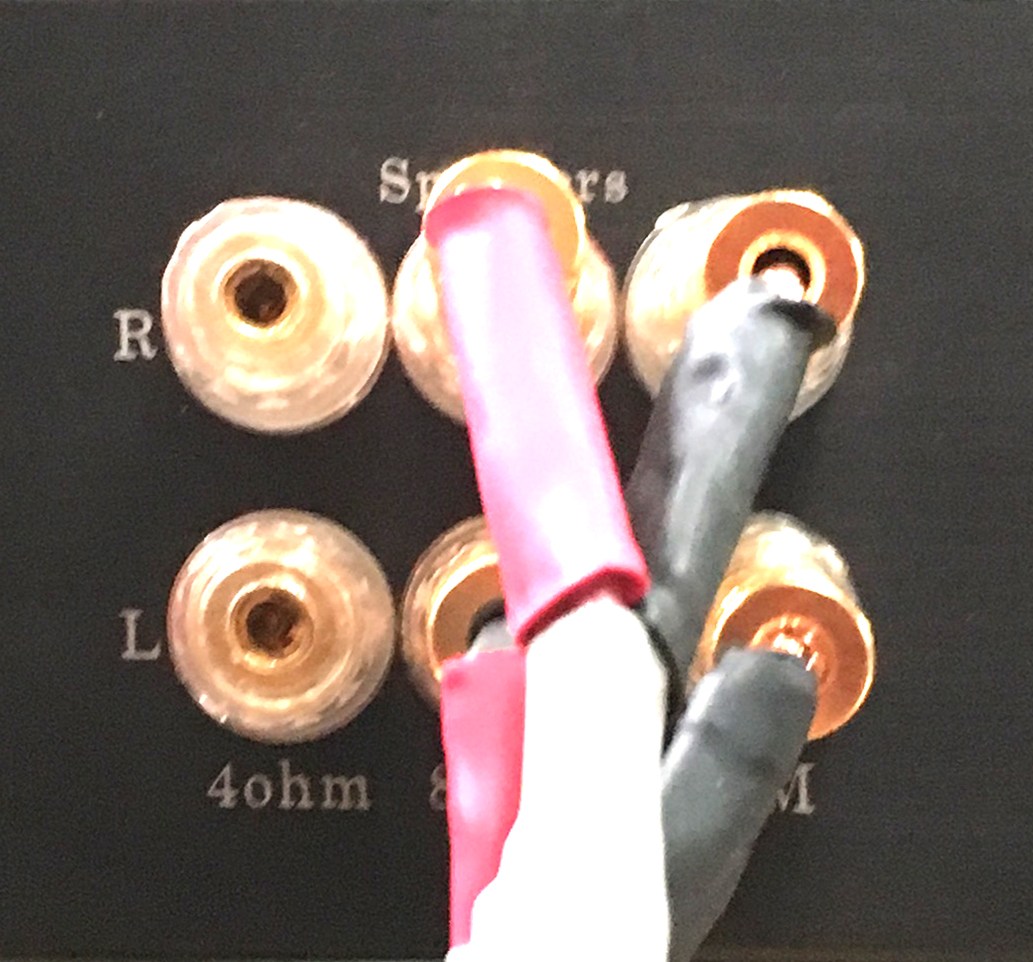
Speaker Jacks - Be sure that the COM wire corresponds with the COM wire (usually black) on the speaker. The other wire should be plugged into either 4 ohms or 8 ohms, depending on your speakers. Most speakers these days are 8 ohms, unless otherwise indicated on the speaker. Note again that the top row is RIGHT and the bottom row is LEFT. The connections shown below are for 8 ohm speakers.
Ground Screw - This is just a ground point for all circuits in the chassis. It serves no purpose and is not dangerous to touch.
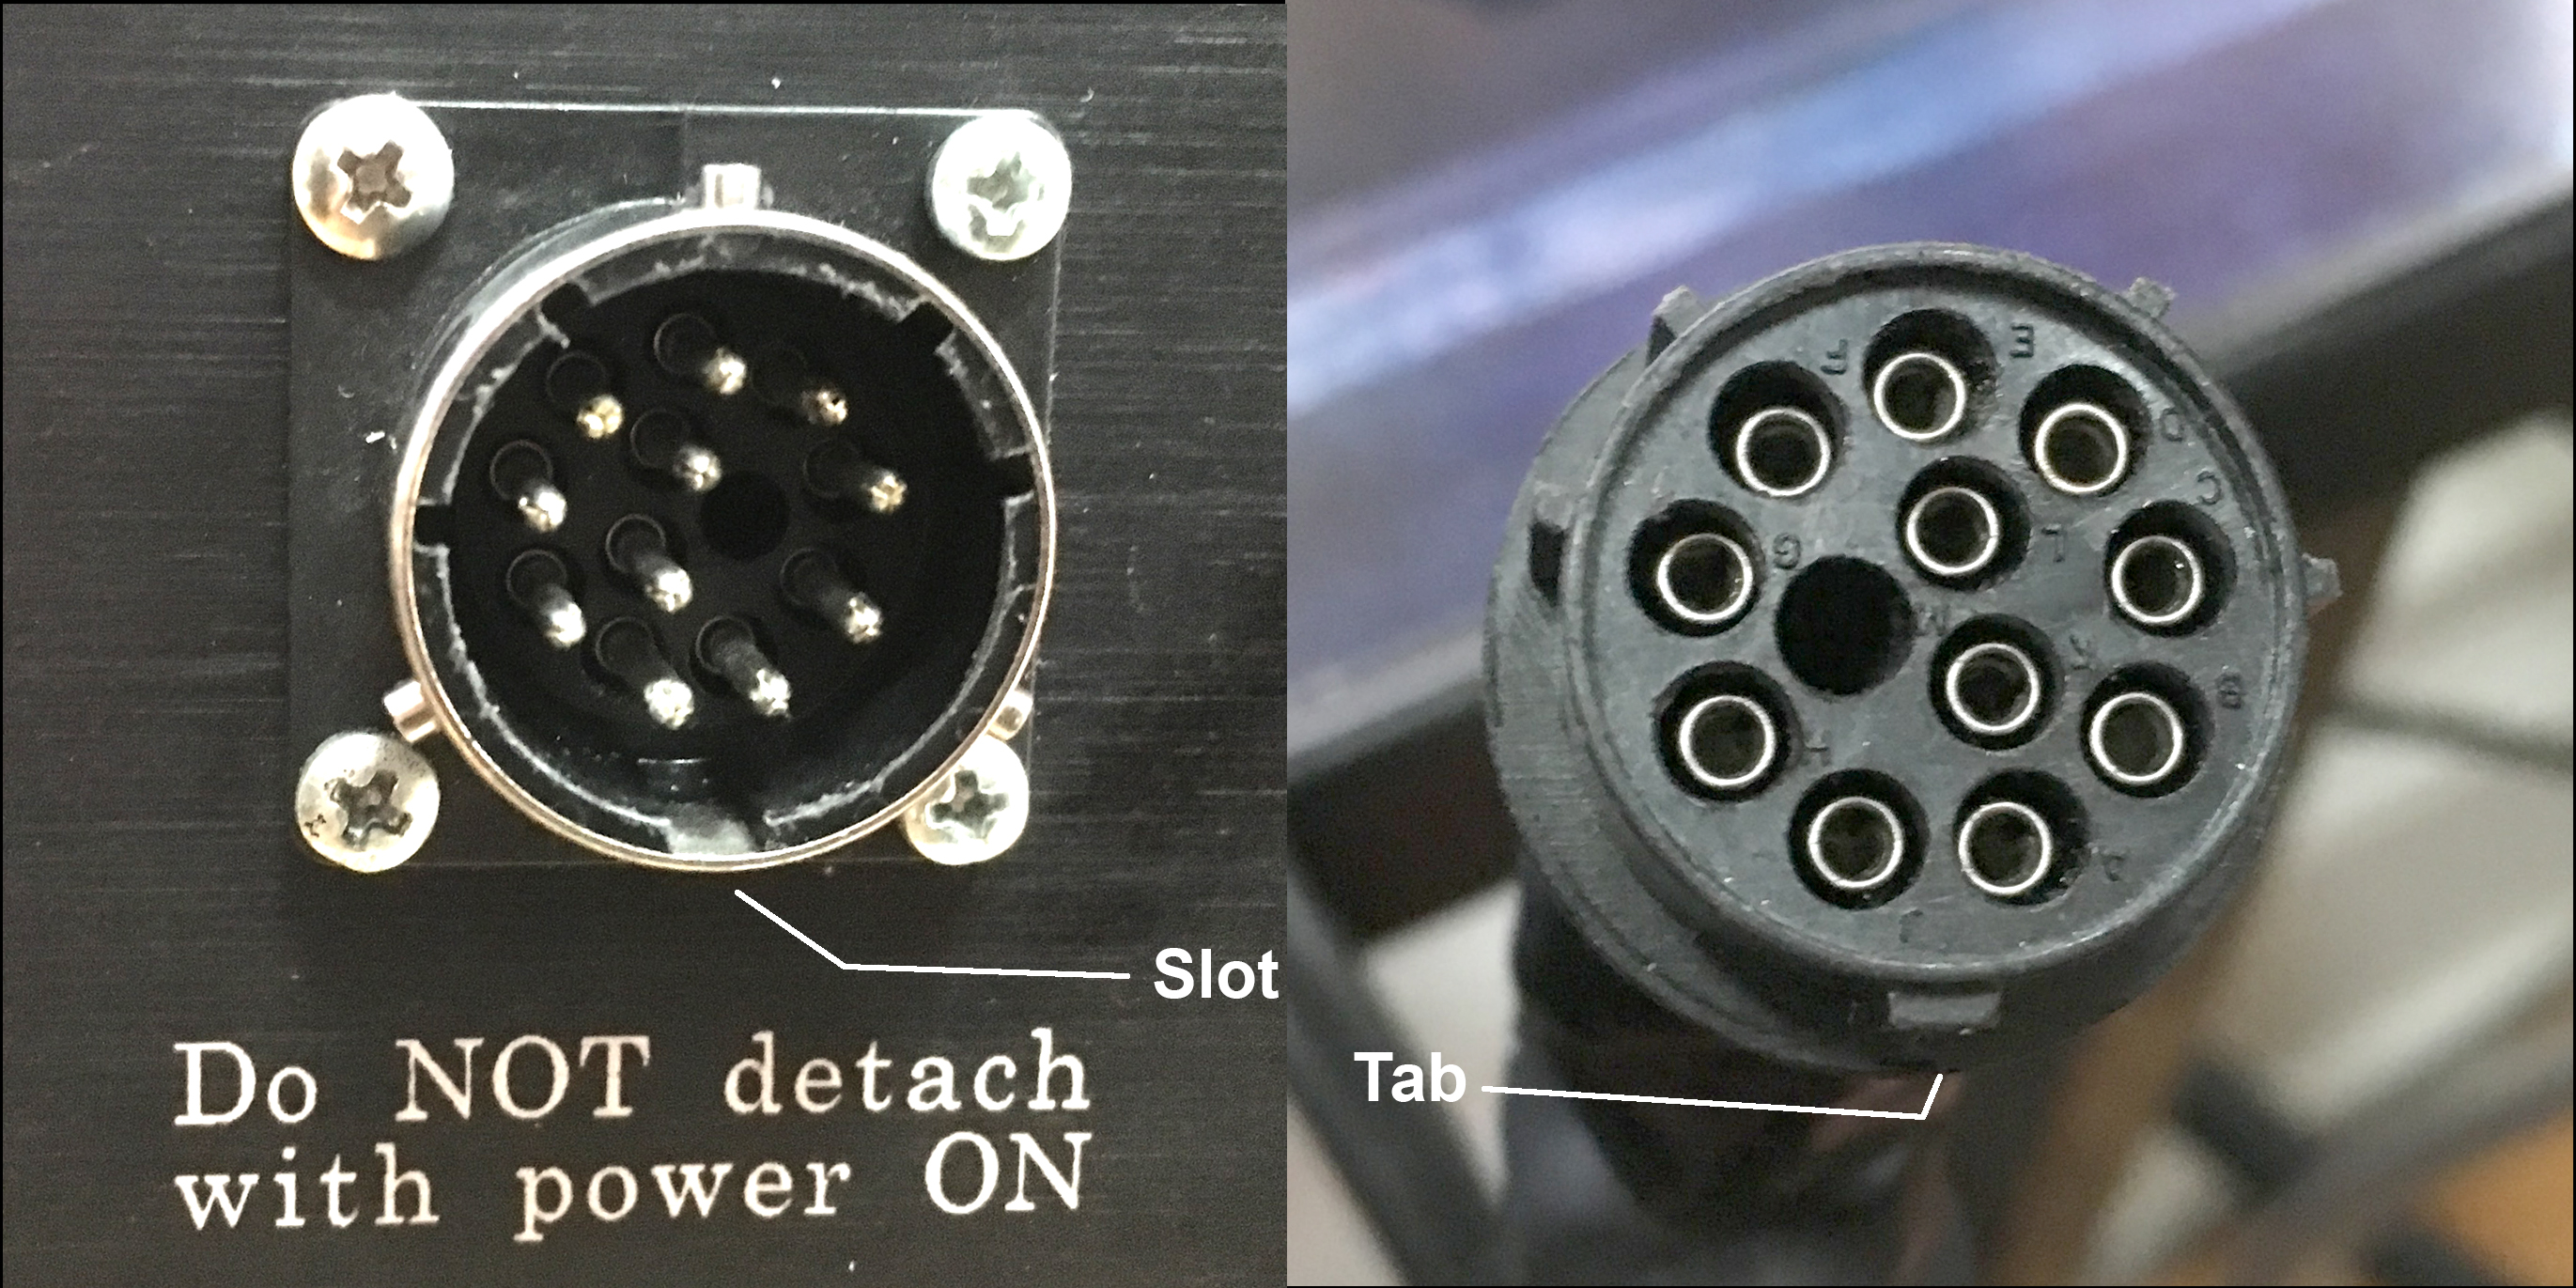
Power Cord Input - a little confusing to use, but once you get everything lined up, its not too bad. Gently rotate the power cord until the tab is at the bottom and insert gently into the amp input. Rotate the plastic locking nut to secure it.
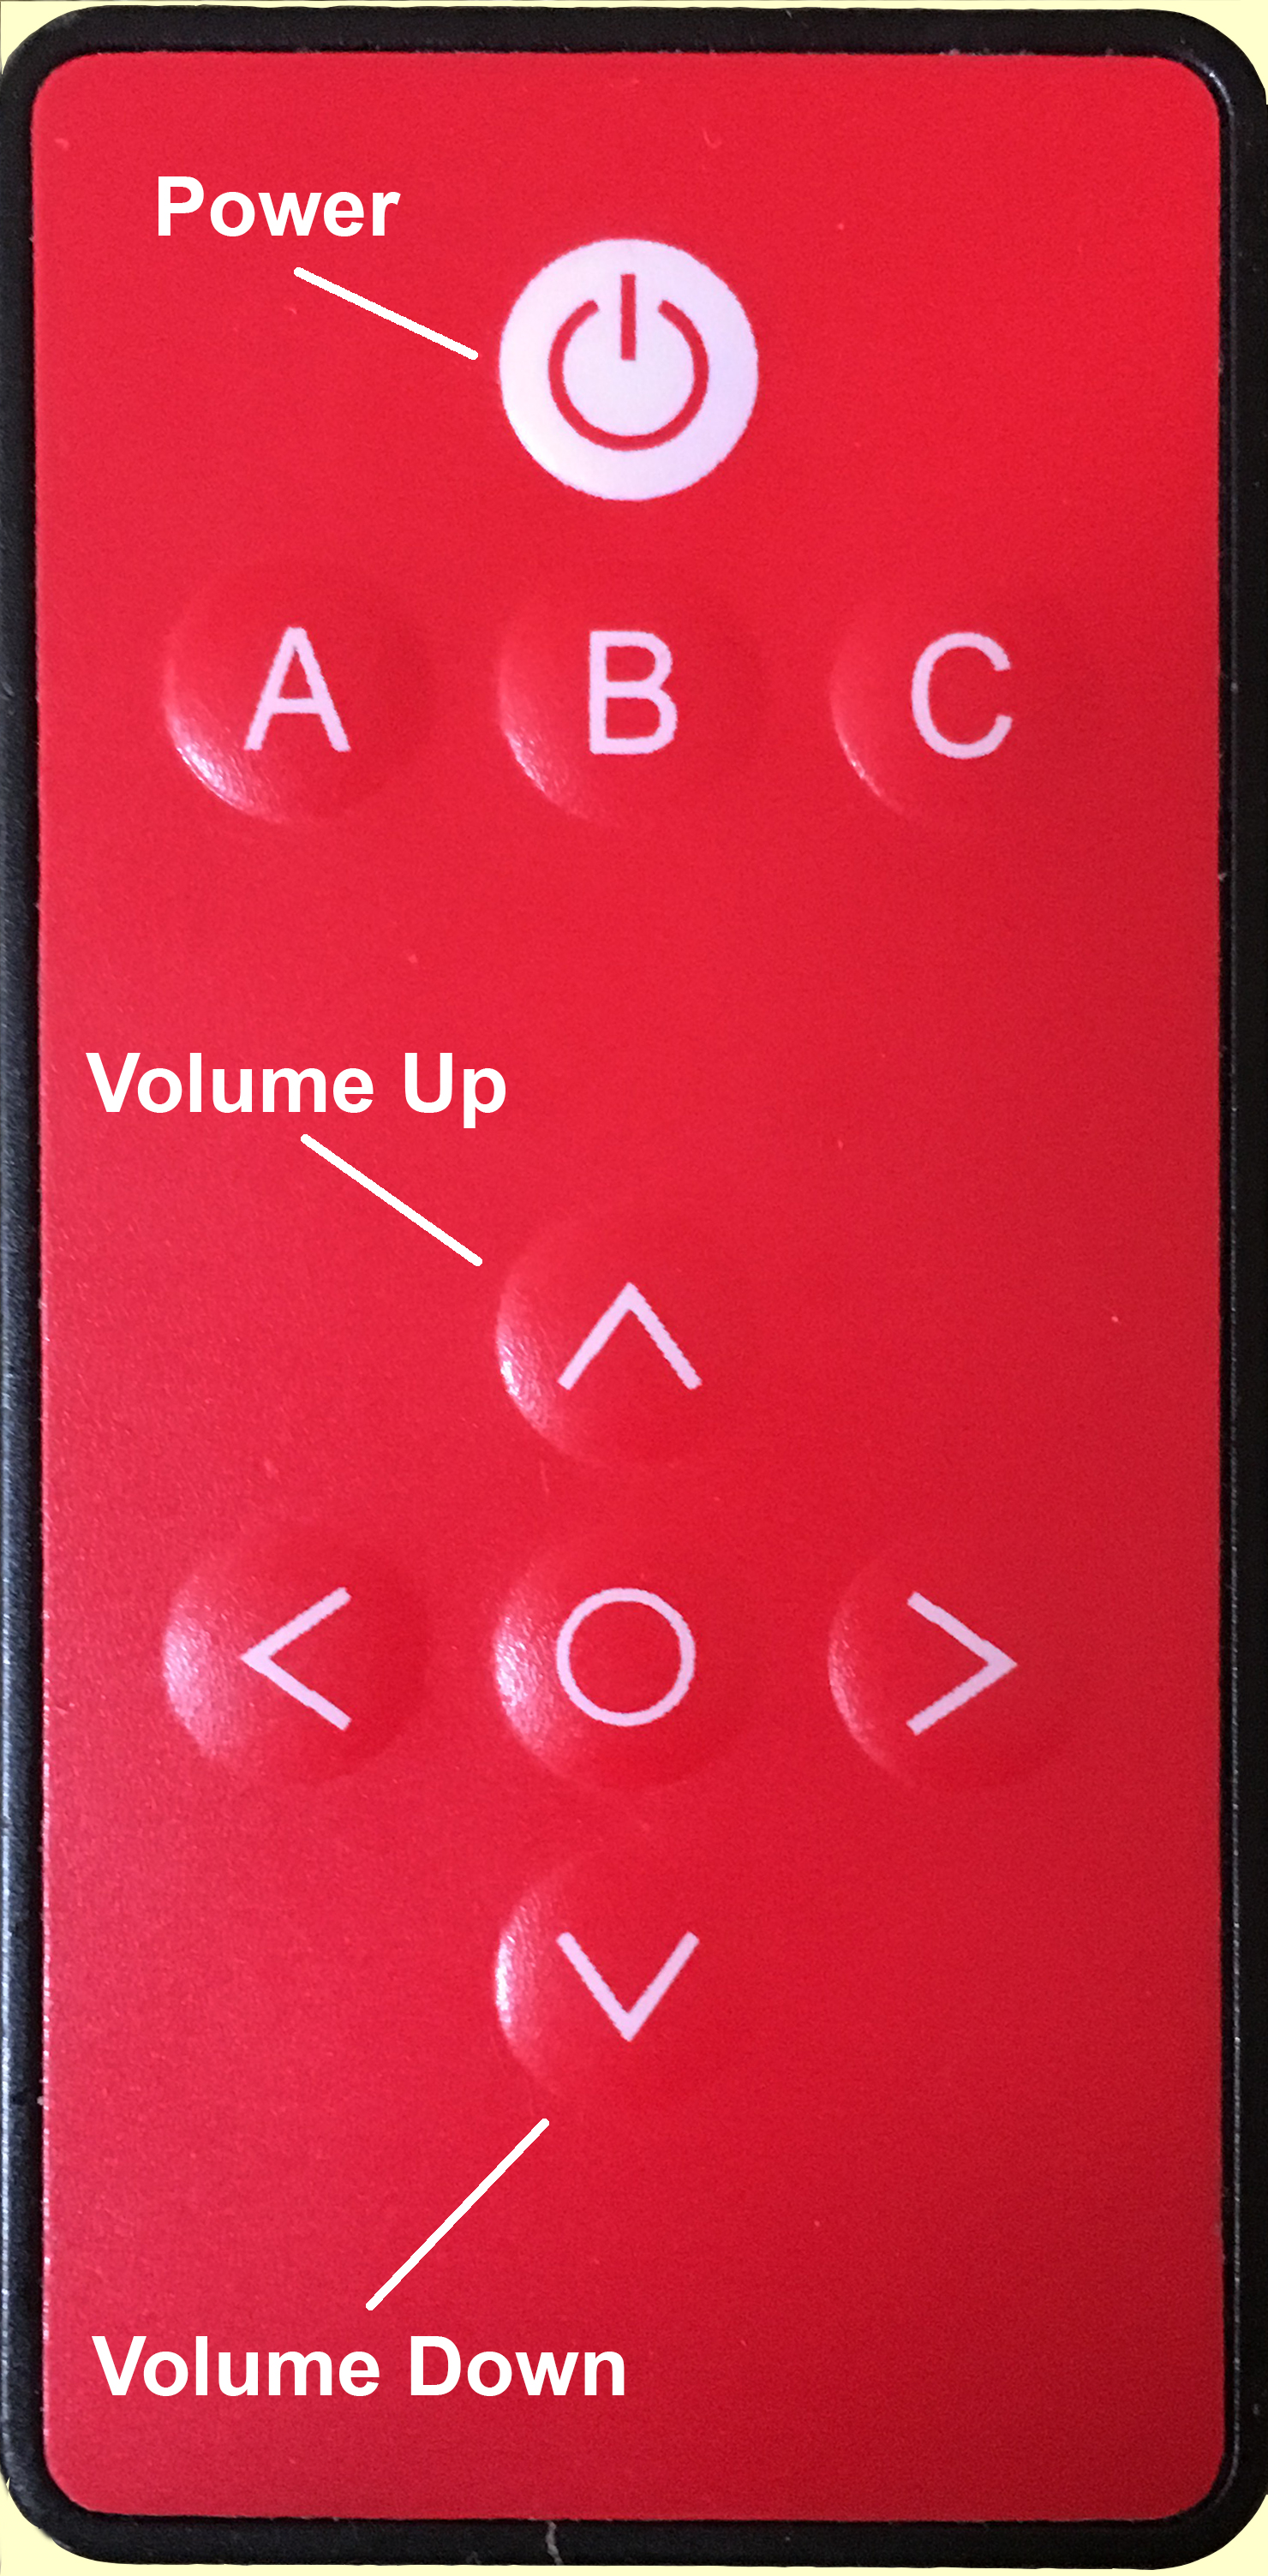
REMOTE
Just a cheapo remote. Eventually will upgrade to a more substantial one. Self-explanatory.